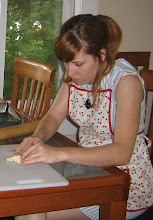
Many people in the class decided to go with another color or print, but I decided to stick to the theme and go with a black rayon sateen for the main part of the dress because it was shiny and use black cotton voile to line the bodice because it would be more comfortable. The class took place on two Saturdays and each day was 6 hours. The dress was completed by the end except for the hem, which I put in a month or two later.
Here it is!

Not too shabby, eh? It certainly helped that my mom sewed the majority of the princess seams outside of class (which I was supposed to do for homework between the two Saturdays). I was super afraid of doing princess seams ever again until I created the Steampunk Vest, where I learned that I much preferred having the convex/middle piece facing up as I could more easily observe/control the fabric "bubbles" that are created when pinning the two pieces together. When I had them facing down, all hell broke lose and the princess seams came out lumpy, and I got increasingly frustrated every time I had to reach for my seam ripper.
Lesson #1: Princess seams are hella easy when the convex side piece is facing up and you don't trust the feed dogs to do the work for you. Also, moms who know how to sew and are willing to teach you RULE.
Because the class itself was strapped for time, we didn't exactly learn how to cleanly attach a lined bodice to a skirt. If you can tell in the photo above, there is a weird bulge in the waist in the fabric. That's because there is a large mass of fabric all shoved together on the inside (three layers, one of them gathered). I later learned while sewing the Carrot Dress that it's super easy to tuck the skirt in between the bodice and lining and have the lining fold in nicely so there's no fabric/stitches poking you in the stomach.
Lesson #2: While it's easier and faster to sew the bodice, lining and skirt all on top of each other, it doesn't take that much more effort to tuck the skirt into the bodice/lining. Also, it looks nicer and is way more comfortable.
Gathering a skirt is, for the most part, pretty easy. This skirt proved a little more difficult, though, as the rayon sateen was super thick and kinda stiff. Also, it turned out kinda lumpy looking (see photo above) because the outside gathering stitch was sewn inside the seam line.
Lesson #3: Use lighter weight fabrics for gathered skirts and sew the outside gathering stitch right along the seam line. If the gathering stitch gets exposed, use a seam ripper to remove.
French seams: Easiest, most awesome seam ever. I use them all the time now, except on side seam pockets (but I might try them sometime and see if they work). I guess you could say that was "Lesson #4".
The hem was a bit weird because the skirt was already pretty short. The instructor suggested we use a roll-up hem, but it made the rayon sateen roll funny and it didn't sit right. Instead, I took out the second roll up and it looked fine. The hem stuck out in a few places and I fixed it using Web Stitch Witchery. A cheap trick, but one that worked. My mom wanted to show me a faced hem, but I didn't have enough fabric left for one (and also, I didn't really have the time to put one in).
Lesson #5: Roll up hems are not good with medium to heavy weight fabric. Also, Web Stitch Witchery works great on black garments.
Another lesson (#6) I learned very quickly is that there are different cutting layouts for different fabric widths. Because there was very little table space and many many people crowded together, I wasn't able to lay down all the pattern pieces at once. Also, with all the chaos in the room, I didn't realize that there were two pattern layouts for this dress and I started off by using the 45" layout when I was using 60". Oops. This led to me having to purchase more fabric, when I had already spent about $30 on it. Boo.
Another thing I learned that wasn't a lesson so much as a realization over the years is that the measurement between my bust and shoulders is about an inch shorter than what is normally used on patterns and store-bought garments. A closer look on this dress, you can see that the dress is actually sitting up off my shoulders. In the future, I will need to adjust patterns to make that space smaller, but also adjust the arm holes to remain the same size.
If I were to make this dress again, I would:
-put in pockets because I can now
-use a lighter weight fabric
-adjust the bust-to-shoulder space
-gather the skirt along the seam line and tuck the excess fabric between the bodice and lining
-used a faced hem

No comments:
Post a Comment